There’s something undeniably primal and satisfying about cutting into a perfectly cooked steak, but for those looking to elevate their home culinary game, dry-aged beef represents the pinnacle of flavor and texture. While it may seem like a process reserved for high-end steakhouses or professional butchers, the art of dry-aging is something you can absolutely tackle at home with a bit of patience, the right setup, and an old refrigerator.
The concept of dry-aging is simple in theory but requires careful execution. It involves storing large cuts of beef in a highly controlled environment for an extended period, typically several weeks. During this time, natural enzymes break down the muscle tissue, tenderizing the meat and concentrating its flavor. Moisture evaporates from the cut, intensifying the beefy taste and creating the nutty, funky, profoundly rich flavor profile that dry-aged steak is famous for. It’s a transformative process, turning a good piece of meat into something truly extraordinary.
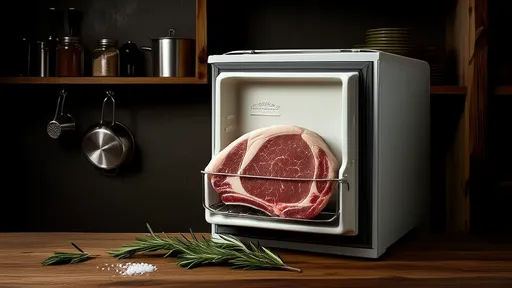
Before you begin, the most critical piece of equipment is, of course, the aging chamber itself. An old, working refrigerator is ideal for this project. It doesn’t need to be fancy; in fact, a simple, basic model without an automatic defrost cycle is preferable. The automatic defrost function in modern fridges introduces heat and moisture to prevent frost buildup—precisely the two elements you want to avoid in dry-aging. An older, "dumb" fridge provides a stable, cold, and dry environment without these disruptive cycles.
Preparing the fridge is your first hands-on step. It must be impeccably clean. A mixture of water and vinegar works well to wipe down every surface, shelf, and wall to eliminate any bacteria or mold spores that could spoil your meat. After cleaning, let the fridge air out completely. The next, and arguably most important, modification is installing a small fan inside. Air circulation is non-negotiable. It ensures every part of the meat’s surface is exposed to the same dry, cold air, preventing moist spots where harmful bacteria could thrive. A simple computer fan wired to a power source and placed on a shelf is sufficient to keep the air moving constantly.
Alongside the fan, you need to manage humidity. The goal is a humidity level between 60% and 80%. Too low, and the meat will desiccate too quickly, becoming hard and losing too much weight. Too high, and you risk spoilage and mold growth. A standalone hygrometer from a hardware store will allow you to monitor the levels inside the fridge. To adjust humidity, a small container of salt or even a pan of water can be placed inside to either absorb or add moisture to the air as needed, letting you fine-tune the environment.
The choice of meat is paramount. You cannot dry-age individual steaks; the process requires a large, primal cut with a thick fat cap. The most popular and forgiving cuts for home dry-aging are the rib roast (bone-in or boneless) and the strip loin. The fat cap and the size of the cut protect the interior meat from over-drying and spoilage. Source your meat from a reputable butcher. Look for a cut with a thick, solid layer of external fat, as this will be your best defense during the aging process. The quality of the starting product directly influences the quality of the final result, so don’t cut corners here.
Once your chamber is ready and your prized cut of beef is acquired, it’s time to begin. Do not wash the meat. Simply place it unwrapped on a wire rack set over a rimmed baking sheet or tray. This setup allows cold air to circulate around the entire cut evenly. Place it in the fridge, ensure the fan is running, and close the door. Now, the hardest part begins: the waiting. You must resist the urge to open the fridge frequently. Every time you open the door, you disrupt the stable climate, introducing warmth and humidity fluctuations. Trust your setup. Check the hygrometer reading through the glass door if possible, and only open it if an adjustment is absolutely necessary.
Over the following weeks, a dark, hardened shell will form on the exterior of the meat. This is the pellicle, and it is a completely normal and desired part of the process. This crust seals the interior, allowing the enzymatic magic to happen within. Some white, powdery mold might also appear; this is typically beneficial Penicillium mold, similar to that on a fine cheese, and is a sign of a healthy aging environment. However, be vigilant for any signs of spoilage: foul, putrid smells or green, black, or fuzzy mold indicate something has gone wrong, and the meat should be discarded immediately.
The duration of the aging process is a matter of personal taste. A minimum of 30 days is standard to develop noticeable tenderness and flavor concentration. Many enthusiasts prefer 45 days for a more pronounced nutty and cheesy character. Pushing to 60 or even 90 days creates an intensely funky, robust steak that is an acquired taste but adored by aficionados. The longer it ages, the more weight it loses to evaporation, and the more you will have to trim away later, but the remaining meat will be exponentially more flavorful.
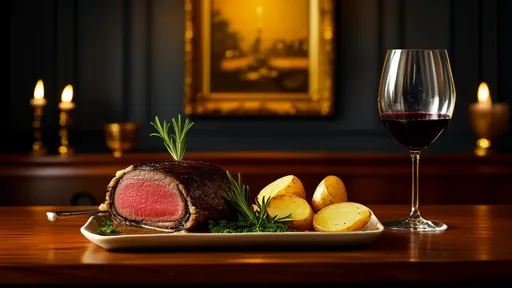
When your steak has reached its peak, it’s time for the reveal. Carefully remove the roast from the fridge. The exterior will be dark, hard, and likely covered in a layer of white mold. It will not look appetizing, but beneath this crust lies your reward. Using a long, sharp boning or fillet knife, carefully trim away the entire hardened pellicle. This can be a substantial amount, sometimes up to 30% of the total weight. Beneath it, the meat will be a deep, dark red, firm to the touch, and will smell intensely beefy and aromatic.
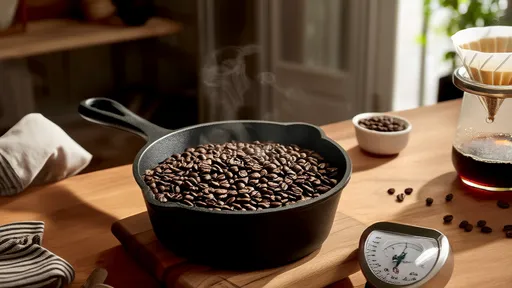
Once trimmed, you can break down the large primal cut into individual steaks. Slice them to your desired thickness. The steaks can be cooked immediately, but many find that resting them in the fridge, uncovered, for another 24 hours after trimming allows the surface to dry further, promoting a phenomenal crust when seared. Cook them as you would any high-quality steak—a hard sear in a cast-iron skillet followed by basting with butter, garlic, and herbs is a classic and perfect method. Let the steak rest before slicing to preserve its incredible juices.
That first bite is your moment of truth. The texture will be incredibly tender, almost buttery, without any mushiness. The flavor is something entirely different from a fresh steak; it’s complex, rich, and layered with umami, nutty, and slightly funky notes that linger on the palate. It’s a profound culinary experience, made all the more rewarding by the knowledge that you created it yourself, patiently guiding a simple piece of meat through its transformation in a repurposed refrigerator.
Embarking on a home dry-aging project is a commitment. It requires an initial investment of time to set up the chamber and weeks of patient monitoring. There is an inherent risk of spoilage, and the trimming process means you end up with less meat than you started with. However, for the dedicated home cook, the payoff is unparalleled. It demystifies a technique shrouded in professional mystery and delivers a restaurant-quality product that can’t be bought in most stores. It’s a rewarding journey into the heart of butchery and flavor development, proving that with a little ingenuity, the best steakhouse in town might just be your own kitchen.

By /Aug 29, 2025

By /Aug 29, 2025

By /Aug 29, 2025

By /Aug 29, 2025
By /Aug 29, 2025

By /Aug 29, 2025
By /Aug 29, 2025

By /Aug 29, 2025

By /Aug 29, 2025
By /Aug 29, 2025

By /Aug 29, 2025
By /Aug 29, 2025

By /Aug 29, 2025

By /Aug 29, 2025

By /Aug 29, 2025

By /Aug 29, 2025

By /Aug 29, 2025

By /Aug 29, 2025
By /Aug 29, 2025
By /Aug 29, 2025
